Fantastische Fotoeffekte in Nachtaufnahmen mit Langzeitbelichtung – Ein Raspberry Pi Einsteigerprojekt mit LED-Strip Steuerung.
In dem YouTube Video zeige ich, wie man mit einem LED Strip und einer einfachen Raspberry Pi Steuerung Nachtaufnahmen mit tollen Fotoeffekte erzeugen kann.
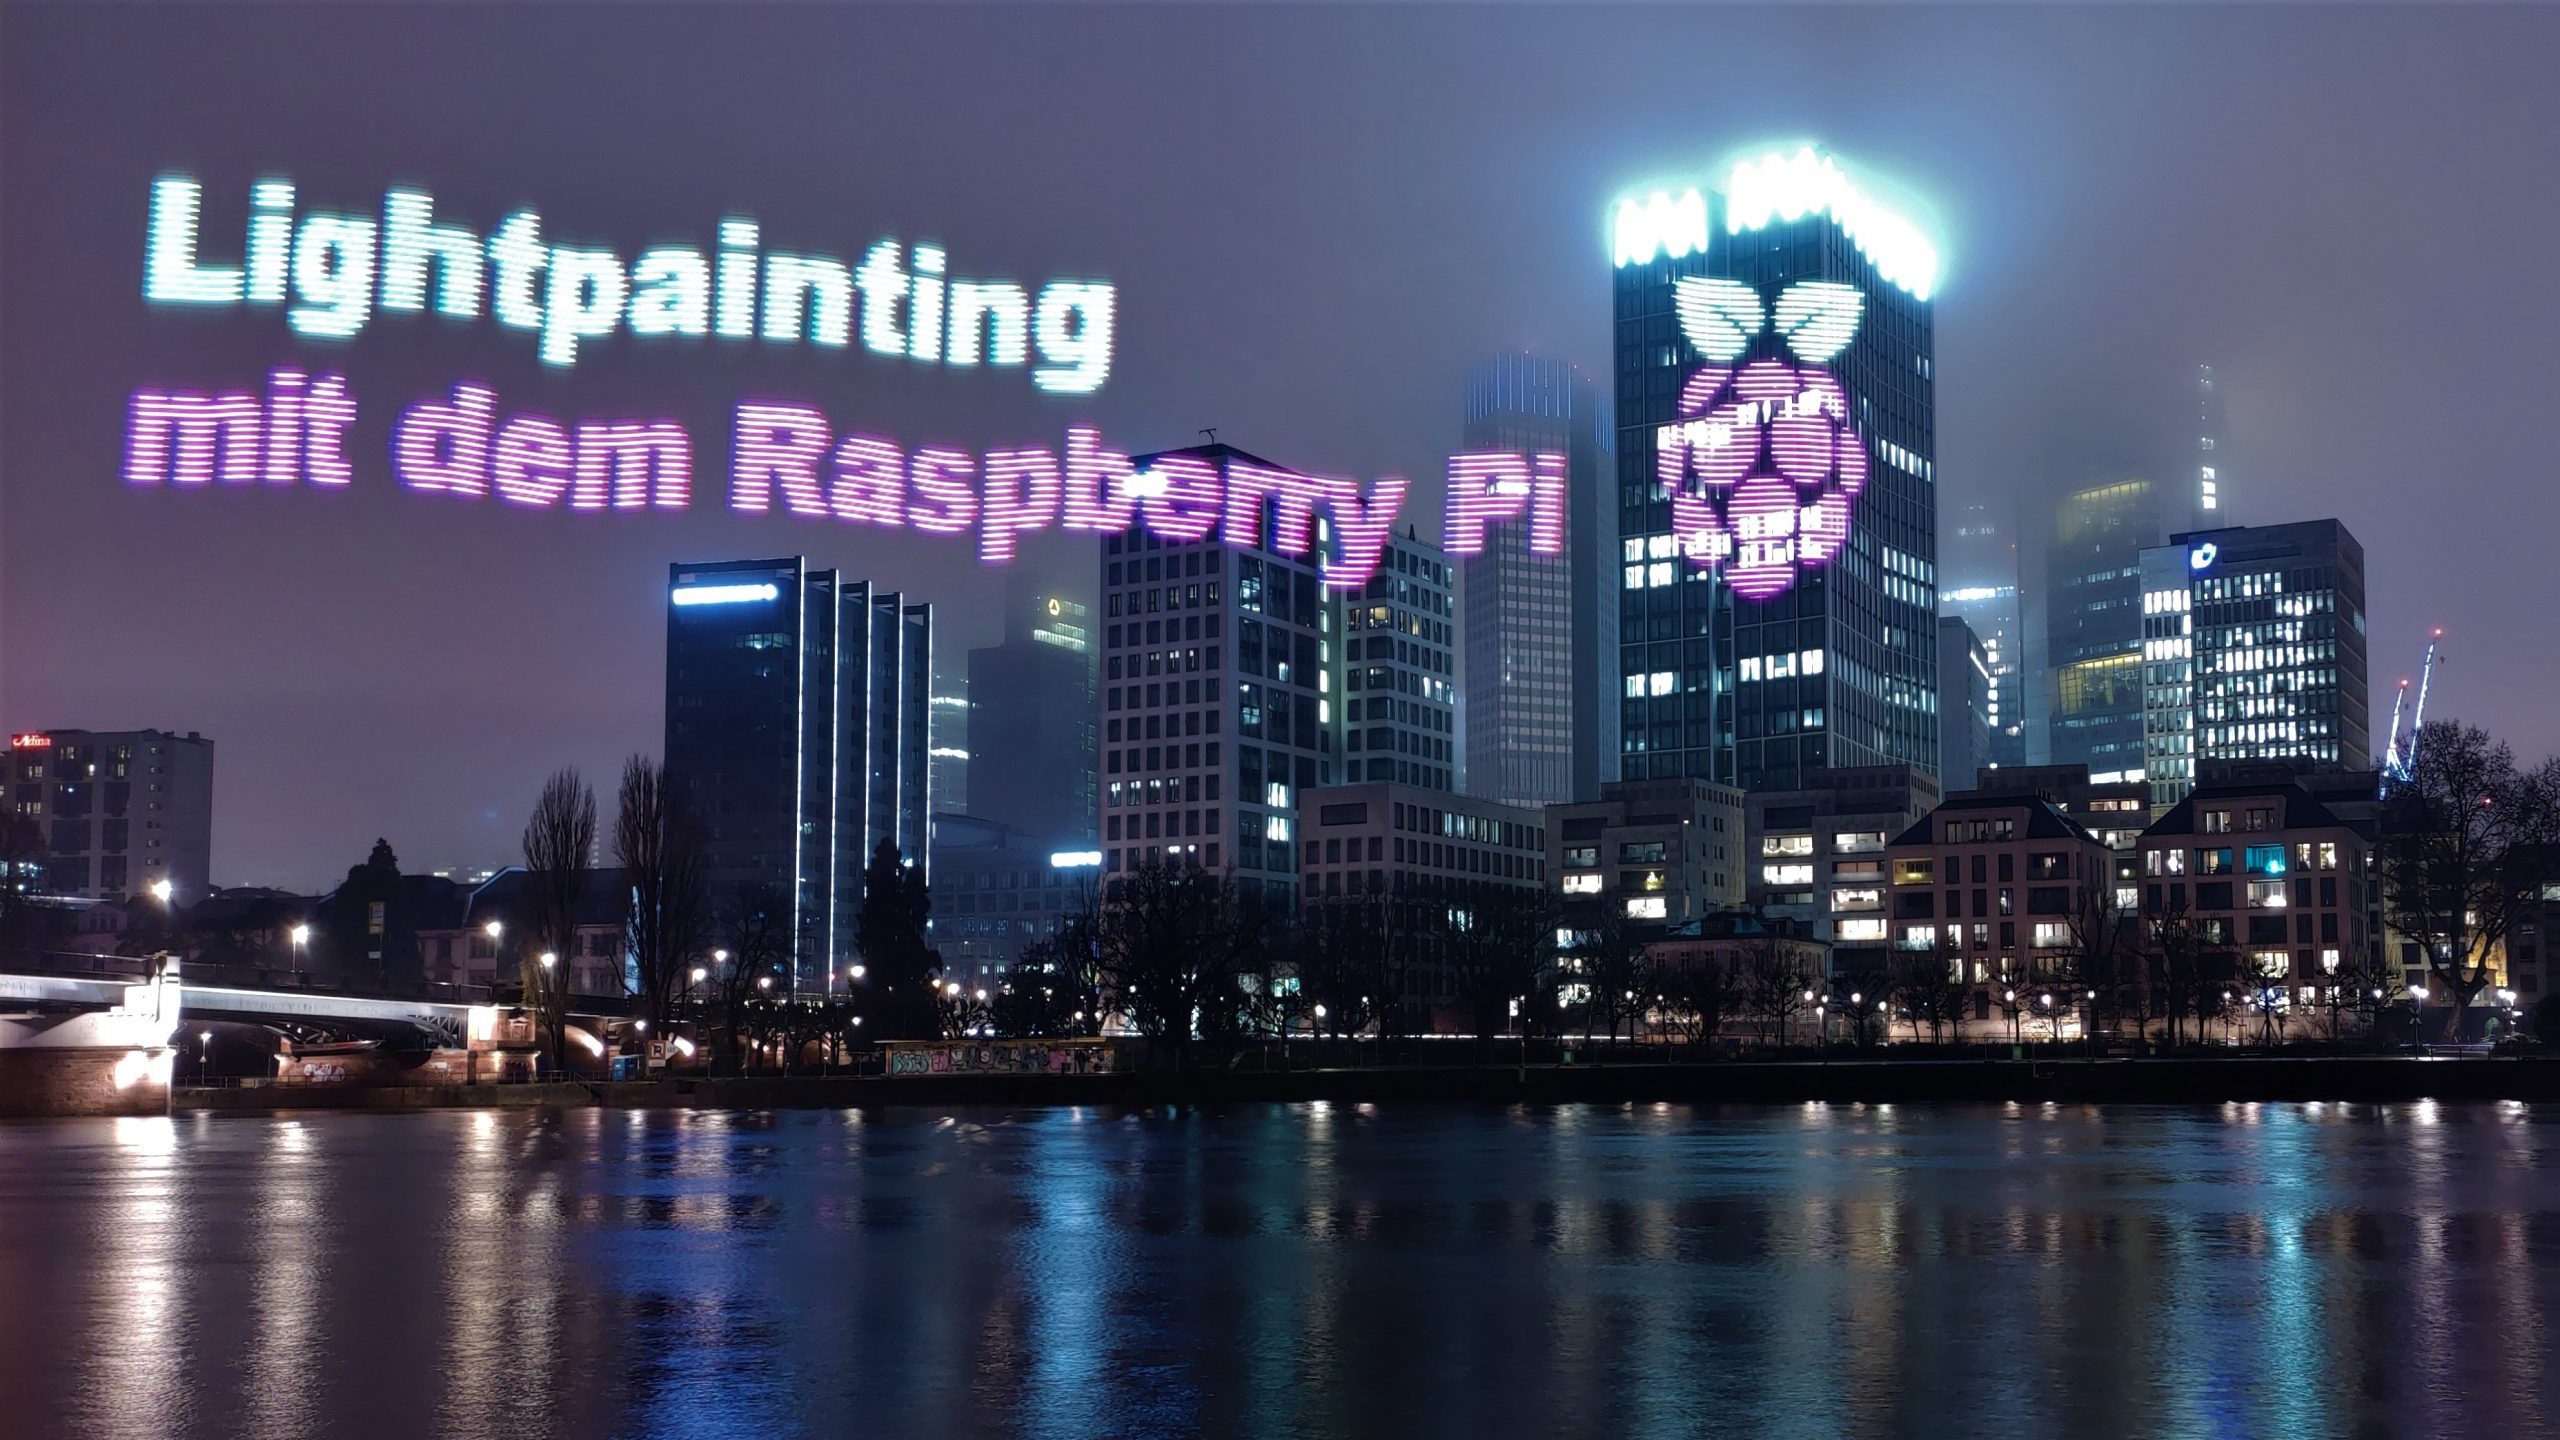
Die Schriftzüge „Frankfurt“ und „Offenbach“ in den folgenden Bildern wurden nicht in einer Bildbearbeitung erstellt, sondern während der Aufnahme mit Langzeitbelichtung mit einem von einem Raspberry Pi gesteuerten LED-Strip in das Bild „gemalt“ (Lightpainting):

Fotos mit Langzeitbelichtung kann man mittlerweile auch mit den meisten Smartphones machen. Dabei benötigt man lediglich ein Stativ, damit die Kamera für den Zeitraum der Aufnahme ruhig steht.
Durch die lange Belichtungszeit, sind die entstehenden Bilder sehr scharf und haben nicht das sonst von Nachtaufnahmen gewohnte rauschen.
Die Raspberry Pi Steuerung erlaubt es, die einzelnen Spalten eines Bitmaps sequentiell auf einem LED Strip auszugeben. Wenn man den LED Strip während der Aufnahme horizontal durch das Bild bewegt, sieht man auf dem Foto das Bitmap praktisch „in der Luft schwebend“. Man selbst ist dabei auf dem Foto unsichtbar, wenn man sich kontinuierlich bewegt.
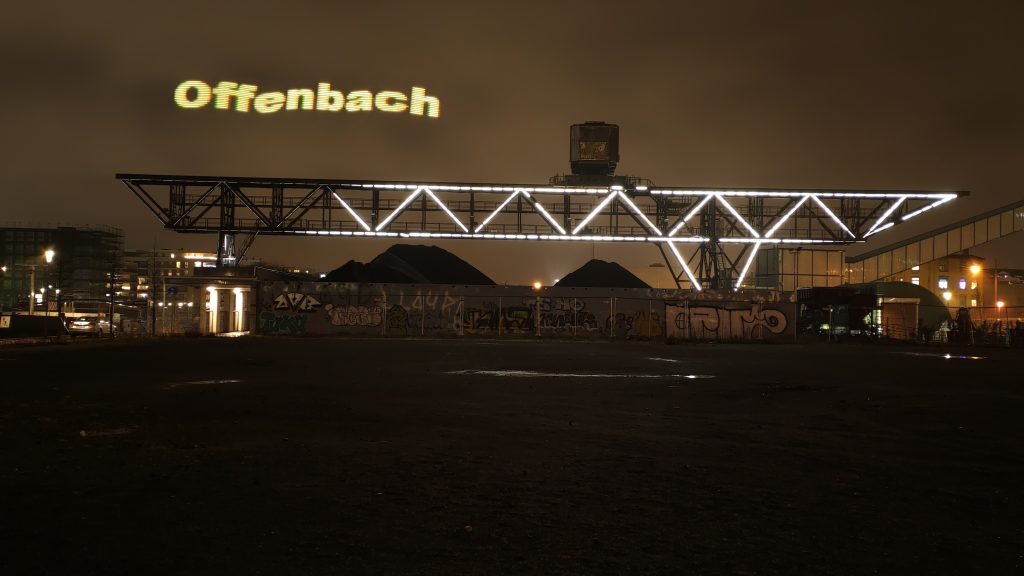
Bewegt man den LED Strip nicht einfach horizontal, kann man damit auch andere Effekte erzielen und mit dem Licht des LED Strips völlig neue Bilder malen, wie man am Beispiel des nächsten Bildes sieht:

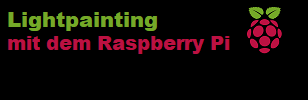
Für das Lightpainting verwendete Bitmaps aus den Beispielbildern


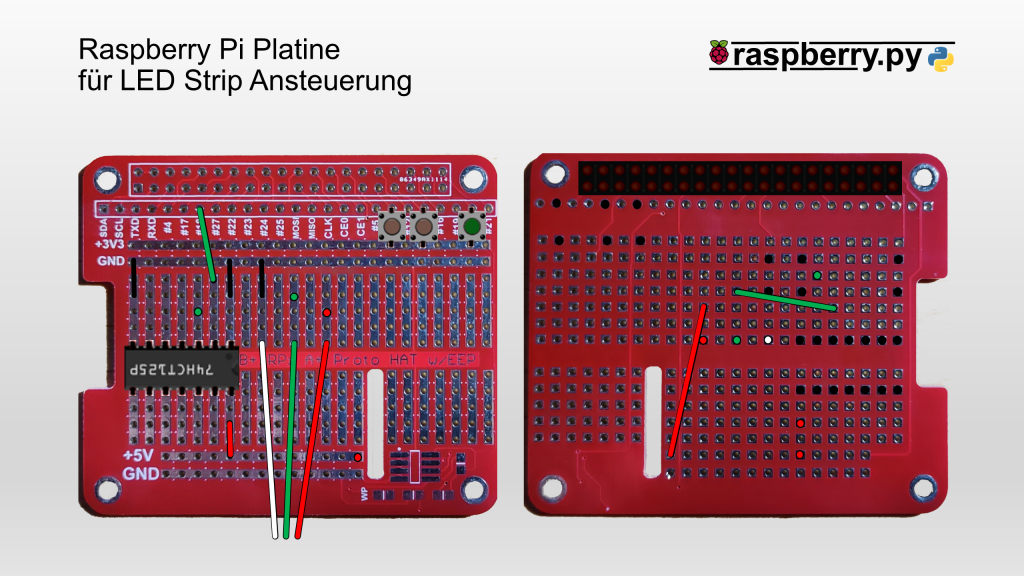
Raspberry Pi Platine für LED Strip Ansteuerung
Verdrahtungsplan mit GeeekPi DIY Shield für Raspberry Pi Model 3B (https://amzn.to/3JsAJt6)
Source Code LED Strip Steuerung für Bitmap-Lightpainting
Hier der Source Code für die LED Strip Ansteuerung ohne Einstellmenü SimpleLightpainting.py
#Bibliotheken einbinden
import RPi.GPIO as GPIO
import time
from rpi_ws281x import *
from PIL import Image

# LED-Strip Konfiguration
LED_COUNT      = 100      # Number of LED pixels.
LED_PIN        = 18       # GPIO pin connected to the pixels (18 uses PWM!).
#LED_PIN        = 10      # GPIO pin connected to the pixels (10 uses SPI /dev/spidev0.0).
LED_FREQ_HZ    = 800000   # LED signal frequency in hertz (usually 800khz)
LED_DMA        = 10       # DMA channel to use for generating signal (try 10)
LED_BRIGHTNESS = 10       # Set to 0 for darkest and 255 for brightest
LED_INVERT     = False    # True to invert the signal (when using NPN transistor level shift)
LED_CHANNEL    = 0        # set to '1' for GPIOs 13, 19, 41, 45 or 53

DEFAULT_FILE = "/home/pi/python/Lightpainting/Bilder/Frankfurt1.png"
DEFAULT_COUNTDOWN = 5
DEFAULT_DELAY = 2
DEFAULT_SPEED = 0.01

GPIO_Port_KeyOk = 20

def ClearStrip():
    # Clear LEDs
    for y in range(LED_COUNT):
        strip.setPixelColor(y, Color(0,0,0))
    strip.show()

if __name__ == '__main__':
    # LED-Strip Initialisierung
    strip = Adafruit_NeoPixel(LED_COUNT, LED_PIN, LED_FREQ_HZ, LED_DMA, LED_INVERT, LED_BRIGHTNESS, LED_CHANNEL)
    strip.begin()

    # Port fuer Taster initialisieren
    GPIO.setmode(GPIO.BCM)
    GPIO.setup(GPIO_Port_KeyOk,GPIO.IN,pull_up_down=GPIO.PUD_DOWN)

    while True:
        # show ready
        strip.setPixelColor(0, Color(0,255,0))
        strip.show()
        time.sleep(0.2)

        # wait for key
        while (GPIO.input(GPIO_Port_KeyOk)==False):
            time.sleep(0.1)

        print(GPIO.input(GPIO_Port_KeyOk))
        print("__Lightpainting__")

        # Load image
        print("Load Image "+DEFAULT_FILE)
        im = Image.open(DEFAULT_FILE)
        pix = im.load()
        pix_x = im.size[0]
        pix_y = im.size[1]
        print("x: "+str(pix_x))
        print("y: "+str(pix_y))

        # Countdown
        ClearStrip()
        for y in range(DEFAULT_COUNTDOWN):
            strip_color = Color(100,0,0)
            strip.setPixelColor(y, strip_color)
        strip.show()
        for y in range (DEFAULT_COUNTDOWN-1,-1,-1):
            time.sleep(1)
            print(y)
            strip.setPixelColor(y, Color(0,0,0))
            strip.show()
        time.sleep(DEFAULT_DELAY)

        # Image Output
        starttime=time.time()
        print("Starttime: "+str(starttime))
        for x in range(pix_x):
            for y in range(LED_COUNT):
                if LED_COUNT-y-1 < pix_y:
                    pixel_color = pix[x,LED_COUNT-y-1]
                    strip_color = Color(pixel_color[0],pixel_color[1],pixel_color[2])
                else:
                    strip_color = Color(0,0,0)
                strip.setPixelColor(y, strip_color)
            strip.show()
            time.sleep(DEFAULT_SPEED)
        endtime=time.time()
        print("Endtime: "+str(endtime))
        print("Runtime: "+str(endtime-starttime))

        ClearStrip()
        time.sleep(5)
Hier der Source Code für die LED Strip Ansteuerung mit Einstellmenü Lightpainting.py
#Bibliotheken einbinden
import RPi.GPIO as GPIO
import time
from rpi_ws281x import *
from PIL import Image

# LED-Strip Konfiguration
LED_COUNT      = 100      # Number of LED pixels.
LED_PIN        = 18       # GPIO pin connected to the pixels (18 uses PWM!).
#LED_PIN        = 10      # GPIO pin connected to the pixels (10 uses SPI /dev/spidev0.0).
LED_FREQ_HZ    = 800000   # LED signal frequency in hertz (usually 800khz)
LED_DMA        = 10       # DMA channel to use for generating signal (try 10)
LED_BRIGHTNESS = 10       # Set to 0 for darkest and 255 for brightest
LED_INVERT     = False    # True to invert the signal (when using NPN transistor level shift)
LED_CHANNEL    = 0        # set to '1' for GPIOs 13, 19, 41, 45 or 53

Pfad = "/home/pi/python/Lightpainting/Bilder/"
FileList = ["Frankfurt1.png","Frankfurt2.png","Frankfurt3.png","Lighpainting1.png","Lighpainting2.png",
            "Offenbach1.png","Offenbach2.png","Offenbach3.png","xSmiley.png","xRegenbogen.png"]
BrightnessList = [6,8,10,15,20,25,30,35,40,45,50]
DelayList = [1,2,3,4,5,6,7,8,9,10]
SpeedList = [0.03, 0.02, 0.015, 0.01, 0.008, 0.005]

DEFAULT_FILE = 0
DEFAULT_BRIGHTNESS = 2
DEFAULT_COUNTDOWN = 4
DEFAULT_DELAY = 1
DEFAULT_SPEED = 3

GPIO_Port_KeyUp = 6
GPIO_Port_KeyDown = 13
GPIO_Port_KeyOk = 20

def ClearStrip():
    # Clear LEDs
    for y in range(LED_COUNT):
        strip.setPixelColor(y, Color(0,0,0))
    strip.show()

def GetNumber(strip_color, selected, limit, Brightness=False):
    # Clear LEDs
    ClearStrip()

    KeyOkPressed = False
    while (KeyOkPressed==False):
        for y in range(limit):
            if y<=selected:
                strip.setPixelColor(y, strip_color)
            else:
                strip.setPixelColor(y, Color(0,0,0))
        strip.show()
        time.sleep(0.2)
        KeyPressed = False
        while (KeyPressed==False):
            if (GPIO.input(GPIO_Port_KeyOk)==True):
                KeyPressed = True
                KeyOkPressed = True
            elif (GPIO.input(GPIO_Port_KeyUp)==True):
                if selected<limit-1:
                    selected=selected+1
                KeyPressed = True
            elif (GPIO.input(GPIO_Port_KeyDown)==True):
                if selected>0:
                    selected=selected-1
                    KeyPressed = True
            time.sleep(0.1)
        if Brightness:
            strip.setBrightness(BrightnessList[selected])
    ClearStrip()
    return selected

if __name__ == '__main__':
    # LED-Strip Initialisierung
    strip = Adafruit_NeoPixel(LED_COUNT, LED_PIN, LED_FREQ_HZ, LED_DMA, LED_INVERT, LED_BRIGHTNESS, LED_CHANNEL)
    strip.begin()

    # Port fuer Taster initialisieren
    GPIO.setmode(GPIO.BCM)
    GPIO.setup(GPIO_Port_KeyUp,GPIO.IN,pull_up_down=GPIO.PUD_DOWN)
    GPIO.setup(GPIO_Port_KeyDown,GPIO.IN,pull_up_down=GPIO.PUD_DOWN)
    GPIO.setup(GPIO_Port_KeyOk,GPIO.IN,pull_up_down=GPIO.PUD_DOWN)

    # Default Settings
    SelectedFile = DEFAULT_FILE
    SelectedBrightness = DEFAULT_BRIGHTNESS
    Countdown = DEFAULT_COUNTDOWN
    Delay = DEFAULT_DELAY
    Speed = DEFAULT_SPEED

    while True:

        # Loop until OK key pressed
        KeyOkPressed = False
        while (KeyOkPressed==False):

            # show ready
            strip.setPixelColor(0, Color(0,255,0))
            strip.show()
            time.sleep(0.2)

            # wait for key
            KeyPressed = False
            while (KeyPressed==False):
                if (GPIO.input(GPIO_Port_KeyOk)==True):
                    KeyPressed = True
                    KeyOkPressed = True
                elif (GPIO.input(GPIO_Port_KeyUp)==True):
                    KeyPressed = True
                elif (GPIO.input(GPIO_Port_KeyDown)==True):
                    KeyPressed = True
                time.sleep(0.1)

            # Change Settings if up or Down Key was pressed
            if KeyOkPressed==False:
                print("__Change Settings__")

                # Select File
                SelectedFile = GetNumber(Color(255,255,255), SelectedFile, len(FileList))
                print("File Selected: " + FileList[SelectedFile])

                # BrightnessMenu
                SelectedBrightness = GetNumber(Color(0,0,255), SelectedBrightness ,len(BrightnessList), True)
                print("Brightness set to: " + str(BrightnessList[SelectedBrightness]))

                # Set Countdown
                Countdown = GetNumber(Color(255,0,0), Countdown, len(DelayList))
                print("Countdown set to: " + str(DelayList[Countdown]) + "s")

                # Set Delay
                Delay = GetNumber(Color(255,255,0), Delay, len(DelayList))
                print("Delay set to: " + str(DelayList[Delay]) + "s")

                # Set Speed
                Speed = GetNumber(Color(80,255,0), Speed, len(SpeedList))
                print("Speed - Time between frames set to: " + str(SpeedList[Speed]) + "s")


        print("__Lightpainting__")

        # Load image
        print("Load Image "+Pfad+FileList[SelectedFile])
        im = Image.open(Pfad+FileList[SelectedFile])
        pix = im.load()
        pix_x = im.size[0]
        pix_y = im.size[1]
        print("x: "+str(pix_x))
        print("y: "+str(pix_y))

        # Countdown
        ClearStrip()
        for y in range(DelayList[Countdown]):
            strip_color = Color(100,0,0)
            strip.setPixelColor(y, strip_color)
        strip.show()
        for y in range (DelayList[Countdown]-1,-1,-1):
            time.sleep(1)
            print(y)
            strip.setPixelColor(y, Color(0,0,0))
            strip.show()
        time.sleep(DelayList[Delay])

        # Image Output
        starttime=time.time()
        print("Starttime: "+str(starttime))
        for x in range(pix_x):
            for y in range(LED_COUNT):
                if LED_COUNT-y-1 < pix_y:
                    pixel_color = pix[x,LED_COUNT-y-1]
                    strip_color = Color(pixel_color[0],pixel_color[1],pixel_color[2])
                else:
                    strip_color = Color(0,0,0)
                strip.setPixelColor(y, strip_color)
            strip.show()
            time.sleep(SpeedList[Speed])
        endtime=time.time()
        print("Endtime: "+str(endtime))
        print("Runtime: "+str(endtime-starttime))

        ClearStrip()
        time.sleep(5)
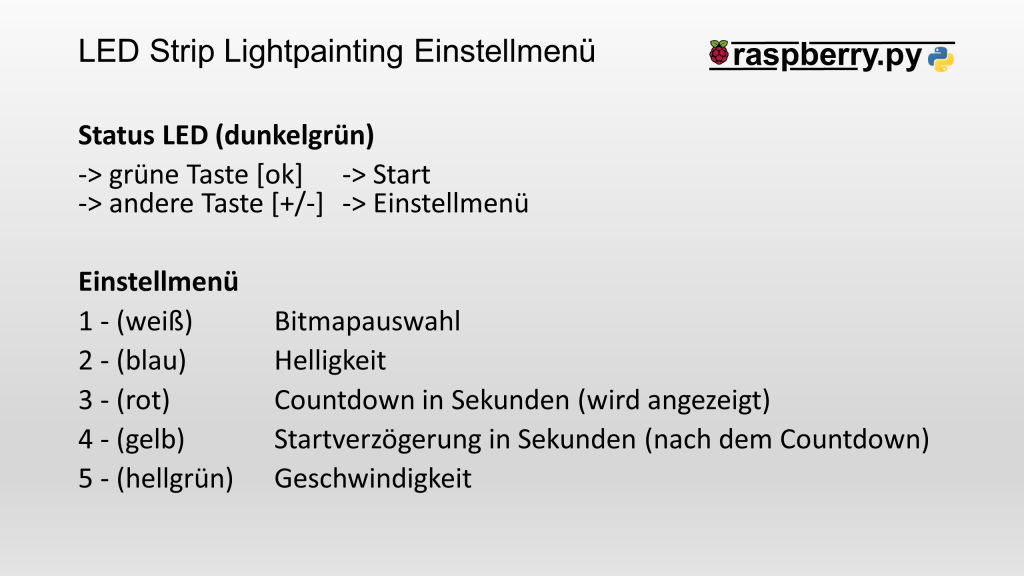
Übersicht Einstellmenü:
Raspberry Pi einrichten
Installation LED-Strip Bibliothek rpi_ws281x
sudo pip3 install rpi_ws281xSource Code auf Github: https://github.com/jgarff/rpi_ws281x
Audioausgabe abschalten, da diese ebenfalls den PWM-Kanal nutzt und ggf. den LED Strip stört
Die Datei /boot/config.txt mit
sudo nano /boot/config.txtim Nano Editor öffnen und darin den folgenden Eintrag mit „#“ auskommentieren:
dtcparam=audio=onAutostart für LED Strip Steuerung einrichten
Beispieldatei /etc/init.d/MeinAutostart (ggf. Pfad zu Lightpainting.py anpassen!)
#! /bin/sh
### BEGIN INIT INFO
# Provides: MeinAutostart
# Required-Start: $syslog
# Required-Stop: $syslog
# Default-Start: 2 3 4 5
# Default-Stop: 0 1 6
# Description: Start LED Text
### END INIT INFO

case "$1" in
    start)
	# Aktion bei Start
	echo "Start LED Text"
	python3 /home/pi/python/Lightpainting/Lightpainting.py
        ;;
    stop)
	# Aktion bei Stop
	echo "Stop LED Text"
	killall python3
        ;;
    *)
	 # Default
	exit 1
        ;;
esac
exit 0
Rechtevergabe und Aktivierung:
sudo chmod 755 /etc/init.d/MeinAutostart
sudo update-rc.d /etc/init.d/MeinAutostart defaults
Test:
sudo /etc/init.d/MeinAutostart startAmazon Links
BTF-Lighting 1m / 100LED IP65 – https://amzn.to/3ewteTT
1m Alu Profil aus dem Baumarkt
4x GeeekPi DIY Shield für Raspberry Pi Model 3 B- https://amzn.to/3JsAJt6
4x Led-Strip-Kabel 2m – https://amzn.to/3HiTvBv
5x Pegelwandler 74HCT125 – https://amzn.to/3955PHp
560x Vorgeformte Jumper Kabel – https://amzn.to/32LaUnv
105x Drucktaster – https://amzn.to/32KGm4Y
Verwendetes Zubehör:
Anker PowerCore Essential Powerbank, 20000mAh – https://amzn.to/3sBZDAJ
Rollei Smartphone Stativ Traveler – https://amzn.to/3Hn5kXf
UHU Heißklebepistole (inkl. 6 Patronen) – https://amzn.to/3qytFCB